How to Grow Potatoes in a Bag: Complete Step-by-Step Container Gardening Guide
Learning how to grow potatoes in a bag opens up exciting possibilities for gardeners with limited space, poor soil conditions, or those seeking easier harvest methods. This innovative container gardening technique has gained tremendous popularity among urban gardeners, hobbyists, and even professional horticulturists for its versatility, space efficiency, and impressive yields.
Whether you're working with a tiny balcony, challenging soil conditions, or simply want to try something new, growing potatoes in bags offers numerous advantages over traditional ground planting methods. This comprehensive guide will walk you through every aspect of successful potato bag cultivation, from choosing the right containers to harvesting your homegrown bounty.
Understanding the Benefits of Growing Potatoes in Bags
Space Efficiency and Mobility
A potato grow bag takes up less space, doesn't depend on good soil in your backyard, and makes those spuds easier to harvest. Unlike traditional potato patches that require significant garden space, bags can be positioned on patios, decks, balconies, or any sunny location. Their portability allows you to move your potato crop as needed for optimal sun exposure or weather protection.
Superior Drainage and Root Health
One of the most significant advantages of growing plants in bags is the promotion of healthy root systems. Traditional containers often lead to root circling, where roots grow around the inside of the pot, becoming tangled and restricted. In contrast, the breathable fabric of grow bags allows for air pruning. When roots reach the edge of the bag and encounter air, they stop growing outward and instead develop more fibrous and branched root systems.
Easier Harvesting Process
The easiest way to harvest container-grown potatoes is to spread out a tarp and tip the container onto it. Sifting through the soil should quickly reveal an abundance of tubers. This method eliminates the risk of accidentally damaging potatoes with digging tools and ensures you don't miss any hidden tubers in the soil.
Choosing the Right Container for Potato Growing

Commercial Grow Bag Options
Choosing the right materials will jumpstart your success. While we have even seen people use plastic garbage bags, we don't recommend it. Plastic bags will not provide adequate air circulation. Our favorite bags for growing potatoes are fabric grow bags. They are breathable and incredibly strong.
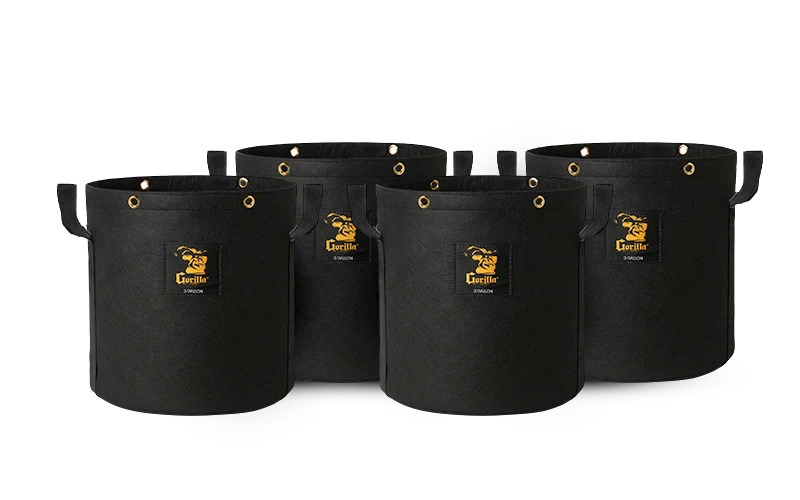
Gorilla Grow Bags represent the gold standard in fabric container gardening. Made from ultra-tough 600-gram non-woven fabric, these professional-grade containers offer superior durability and root protection while promoting optimal air pruning for healthier plants.
For potato cultivation, consider these size options:
- 10 Gallon Grow Bags: Perfect for 3-5 seed potatoes with excellent yield potential
- 15 Gallon Grow Bags: Ideal for larger harvests and deep root development
- 20 Gallon Grow Bags: Maximum space for impressive yields of up to 15 pounds per bag
DIY Container Alternatives
Making your own bag takes more time but costs less. The easiest bags are just old burlap sacks with the tops rolled down. You can also sew or staple together durable fabric or even weed barrier fabric into the appropriate shape. Leave enough fabric at the top to unroll as you hill the potatoes inside.
Alternative container options include:
- Recycled coffee sacks (jute/burlap)
- Heavy-duty reusable shopping bags
- Large canvas totes with drainage holes
- Repurposed feed bags
However, avoid plastic containers without proper drainage, as they can lead to waterlogging and root rot.
Essential Materials and Preparation
Selecting Quality Seed Potatoes
New potatoes grow from the "eyes" of mature potatoes, so in order to start a fresh crop, you'll need seed potatoes, which are chunks of mature potatoes with at least one eye that has sprouted. You can cut up potatoes from the grocery store that have sprouted but you're likely to have more variety of choices if you get the seed potatoes from a garden center or online.
Always buy seed potatoes because they're guaranteed to be virus-free, rather than ones that have just sprouted in the cupboard under the sink. Certified seed potatoes are disease and pest free. They may give you a more reliable and larger harvest.
Recommended Varieties for Bag Growing:
- First Earlies: Red Duke of York, Lady Christl, Orla, Rocket (mature quickly, perfect for small spaces)
- Fingerlings: Colorful and flavorful oblong types work especially well in bags
- Storage Varieties: Yukon Gold and Russet for longer-term storage
Soil Preparation and Composition
To start, you will need to prepare a suitable growing medium for your potatoes. A combination of soil and compost is ideal to ensure proper drainage and provide essential nutrients for your plants. Mix even parts of garden soil and compost, aiming for a loose, well-aerated texture.
Optimal soil mixture components:
- 1/3 high-quality compost
- 2/3 organic potting mix or garden soil
- Optional: Worm castings for added nutrition
- Avoid heavy clay soils that retain too much moisture

Pre-Planting: The Chitting Process
Understanding Chitting
Before planting your seed potatoes in a bag, it's time to go through the chitting process. Don't worry if you've never heard of chitting. It's a simple process and just means the practice of encouraging the potatoes' eyes to sprout before planting. This helps to speed up the growth process once they are in the bag, leading to an earlier harvest.
How to Chit Seed Potatoes
Step-by-Step Chitting Process:
-
Inspect the potatoes: Look for firm seed potatoes with multiple eyes, as these will produce the most shoots. Dispose of any soft, wrinkled, or visibly damaged potatoes.
-
Place them in a container: Use a shallow container, such as an egg carton or a tray, and place the seed potatoes in it with the eyes facing upwards.
-
Position in ideal conditions: Place the container in a cool, light-filled room (60-70°F) away from direct sunlight.
-
Wait for sprouting: The eyes on these seed potatoes will develop shoots over 4-6 weeks. They're ready when sprouts are 1/2 to 1 inch long.
-
Prepare for planting: If a seed potato is large (more than 2.5" long) and has more than one eye, you can cut the potato into 1-2 inch sections (keeping an eye on each section).
Step-by-Step Planting Process
Initial Setup and Positioning
After the last frost in spring, set the bag in your sunny spot—it will be too heavy to move once it's positioned. Select the sunniest site possible. All-day sun is best, but as little as 6 to 8 hours will do. Place the bag in an area where it can receive full sunlight, at least 6 hours each day. Try to avoid putting the bag on a surface that will get too hot, like concrete or asphalt, since that will damage the plants.
Preparing the Container
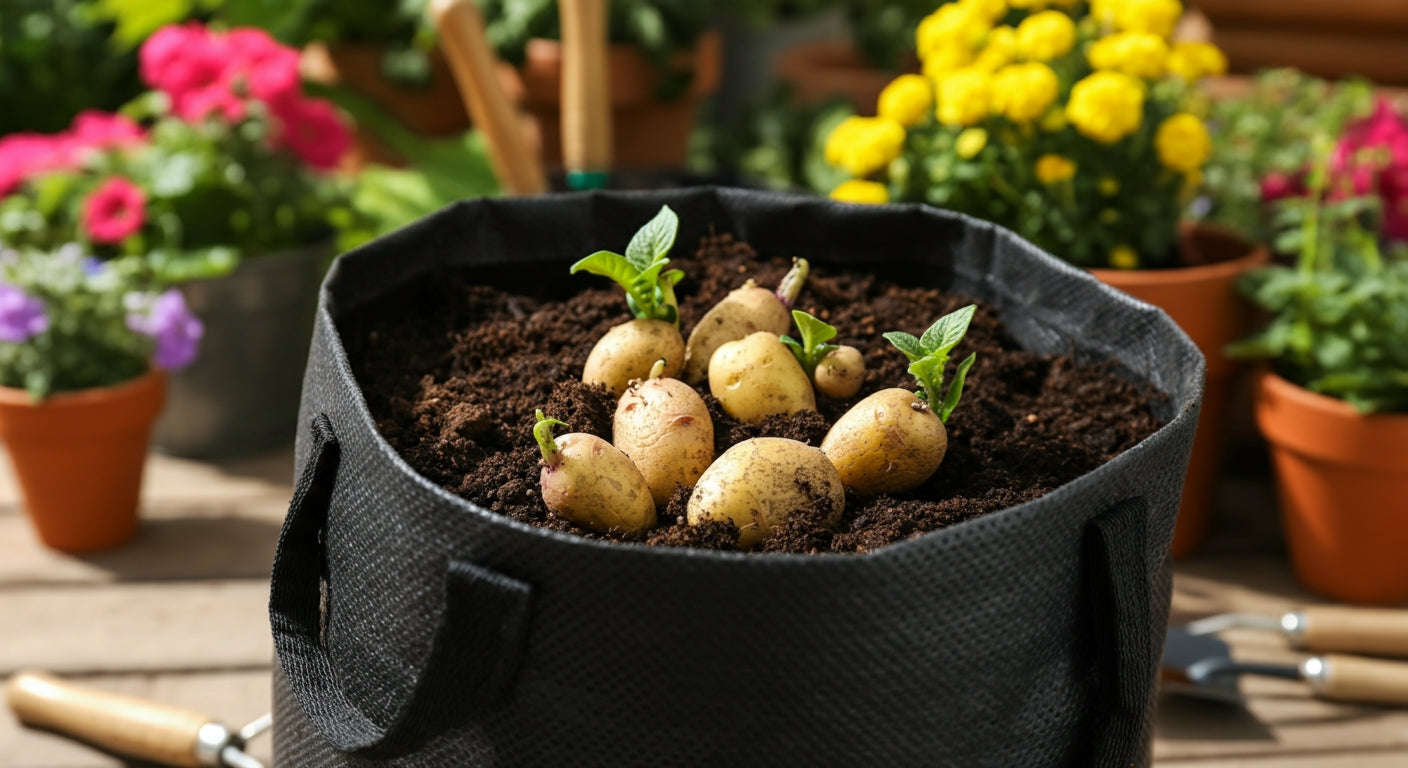
Roll the sides of the potato bag down so it's just under a third of its usual height. Add 10cm peat-free compost to the bottom of the bag and place three to five chitted potatoes on the surface. This initial setup creates the foundation for successful potato development.
Fill your bag with the prepared soil-compost mixture up to around 4 inches (10 cm) deep. This layer will act as the base for your potato plants. For larger containers, adjust the soil depth proportionally while maintaining proper drainage.
Planting Your Seed Potatoes
Set 6 to 8 seed potatoes on top of the soil mix in the bag. Spread the potatoes out from each other so each has room to grow roots. Cover them completely with about 2 inches more of the compost-coir mix and dampen the top layer of the mix.
Proper Spacing Guidelines:
- 10-gallon bags: 3-5 seed potatoes
- 15-gallon bags: 5-7 seed potatoes
- 20-gallon bags: 7-10 seed potatoes
Cover with another 8-10cm of compost and water well to ensure the soil settles around the seed potatoes and provides proper moisture for sprouting.
The Hilling Process: Key to Success
Understanding Why Hilling Matters
The reason for layering is the same as hilling. Potato tubers send out roots at the eyes, which branch out in the soil. The more you cover the top of the root zone, the more roots they send out. More roots equal more potatoes. This process, sometimes called "earthing up," prevents potatoes from being exposed to light and developing green patches, which contain toxic solanine.
Progressive Hilling Technique
In about two weeks, you'll see leafy green stalks emerging from the top of the soil. Add more of the compost mix or your potting soil mixture up to the lowest leaves. Continue adding the mix every week or two as the stalks grow.
Hilling Schedule:
- First Hilling: When shoots reach 8cm (3 inches), cover with 10cm (4 inches) of soil, leaving top leaves exposed
- Subsequent Hillings: Repeat every 2-3 weeks as plants grow 8-10 inches above soil level
- Final Stage: Continue until bag is filled to capacity or you run out of soil mixture
When the shoots have grown to around 8cm, 'earth them up' by covering them with another 10cm of compost. Do this every couple of weeks, gradually rolling the bag back up to its intended height.
Watering and Maintenance Requirements
Proper Watering Techniques
Water whenever the mix gets dry, but don't let it become soggy. The porous fabric allows the Potato Bag to breathe, which prevents overheating and overwatering. However, it's important to monitor the moisture level in the bag because it can dry out quickly. The soil should feel moist, not soggy.
Watering Guidelines:
- Check soil moisture daily during hot weather
- Water when top 1-2 inches feel dry to touch
- Apply water until it drains from the bottom
- Maintain consistent moisture without waterlogging
- In summer heat, daily watering may be necessary
Nutrient Management
If you like to use your own fertilizer, incorporate granular fertilizer during soil preparation. For ongoing nutrition, apply liquid fertilizer every 2-3 weeks during active growth periods. Fish emulsion provides excellent organic nutrition for developing tubers.
Monitoring Plant Health
Pay attention to watering and your plant will flower and grow vigorously through the summer. Watch for common issues like:
- Pest Problems: Hand-pick potato beetles if present
- Disease Signs: Remove any yellowing or diseased foliage immediately
- Nutrient Deficiencies: Yellowing leaves may indicate need for additional fertilization
Harvesting Your Potato Crop
Recognizing Harvest Time
Toward the end of the season, however, the leaves will start yellowing and the stems will wilt. At this point, stop watering and wait a week or two. After that, the potatoes are ready to harvest. In about six weeks, you will see tiny flowers on the plants. A few weeks later, the leaves and stalks will wilt and turn brown—that means it's time to harvest.
Harvest Indicators:
- Plant foliage turns yellow and dies back
- Flowers have appeared and finished blooming
- 90-120 days have passed since planting
- Stems become brittle and brown
Two Harvesting Methods
Early "New" Potato Harvest: Once the potatoes flower, you can harvest new potatoes. That's what make the flaps so great. You can reach right in the side and pull out those baby spuds and not disturb the top of the plant so it can keep growing.
Full Harvest: Gently turn the bag on its side and dump out the contents. Plunge your hands into the pile and root around for the buried treasure—your homegrown potatoes! Empty the bag — plants, soil and all — into a wheelbarrow. Dig through the soil and pull out the potatoes.
Expected Yields
You can expect to harvest about 7 lbs. of potatoes, although you could get as much as 13 lbs. in a good year with proper care and optimal growing conditions. The actual yield depends on:
- Container size and soil volume
- Variety selection and seed potato quality
- Growing conditions and care consistency
- Weather patterns throughout the season
Post-Harvest Care and Storage
Curing Process
Curing your potatoes hardens their skin and prepares them for long-term storage. Handle the potatoes gently – they can bruise – and move them to dry in an area out of the light to avoid greening. Brush excess dry soil from potatoes but don't wash them until you're ready to use them.
Proper Storage Conditions
It's best to store potatoes in a cool, dark, well-ventilated, dry space – ideally between 45-55°F. A basement or root cellar is ideal, though a cool pantry or spare closet can work too. Store the potatoes in a breathable container such as a paper bag, mesh bag, or cardboard box.
Storage Tips:
- Avoid refrigerating potatoes when possible
- Keep away from direct sunlight and artificial light
- Regularly inspect and remove damaged potatoes
- Separate different varieties for optimal storage life
Troubleshooting Common Issues
Drainage Problems
If you don't have big space for planting potatoes, or you don't have a garden, growing in bags solves space issues. However, good drainage is vital for potatoes, especially when growing in a bag. You want to prevent waterlogging, which can lead to root rot.
Solutions:
- Ensure bags have adequate drainage
- Use well-draining soil mixtures
- Avoid overwatering during cool periods
- Position bags on surfaces that allow drainage
Pest Management
Common pests include potato beetles, slugs, and aphids. Address these through:
- Regular inspection and hand-picking
- Beneficial insects and natural predators
- Organic spray solutions when necessary
- Proper plant spacing for air circulation
Weather-Related Challenges
Potatoes pretty much quit growing spuds much above 80 degrees. This is especially important in hot climates where container heating can stress plants.
Heat Management:
- Position bags in morning sun, afternoon shade during extreme heat
- Use light-colored containers to reduce heat absorption
- Maintain consistent soil moisture
- Consider shade cloth during heat waves
Advanced Tips for Maximum Success
Companion Planting in Containers
While space is limited in bags, consider companion herbs like:
- Chives (natural pest deterrent)
- Parsley (attracts beneficial insects)
- Basil (may improve flavor)
Extending the Growing Season
You can plant your seeds in the fall if you don't get hard frost in the winter. Many folks in Southern California start potatoes in November! For colder climates, start indoors and move outside after frost danger passes.
Maximizing Yields
Professional Tips:
- Use certified seed potatoes for disease resistance
- Maintain consistent soil moisture throughout growing season
- Provide adequate nutrition during tuber formation
- Choose appropriate varieties for your climate zone
- Space plants properly to avoid competition
Container Reuse and Sustainability
Add the old soil to your garden or compost pile. Clean out the bag and save it for next year. Gorilla Grow Bags are designed for multi-season use, making them an excellent long-term investment for sustainable gardening practices.
Bag Maintenance:
- Clean thoroughly between seasons
- Inspect for wear and repair small tears
- Store in dry location when not in use
- Sanitize if disease issues occurred
Conclusion: Embracing Container Potato Growing
Learning how to grow potatoes in a bag represents more than just a gardening technique—it's a gateway to food independence, space-efficient cultivation, and the incomparable satisfaction of harvesting homegrown vegetables. This method successfully combines traditional growing wisdom with modern container technology to create an accessible approach suitable for gardeners of all experience levels.
The versatility of bag growing allows you to cultivate fresh potatoes regardless of your living situation, soil quality, or available space. Whether you're working with a small balcony, challenging soil conditions, or simply want to try an innovative growing method, container potato cultivation offers proven results with proper technique and care.
With high-quality containers like Gorilla Grow Bags, proper soil preparation, and consistent care throughout the growing season, you can expect impressive yields of fresh, flavorful potatoes that far exceed store-bought alternatives in both taste and nutritional value.
Start your potato growing journey today and discover why this space-saving technique has become a favorite among gardeners worldwide. The satisfaction of harvesting your own homegrown potatoes, combined with the ease and efficiency of container growing, makes this an invaluable skill for any gardener seeking to maximize their harvest potential in minimal space.

Lena Myles
I'm a mushroom enthusiast and home cook based in Oregon. I'm passionate about foraging and creating fungi-focused recipes, especially delicious, plant-based dishes using gourmet mushrooms like trumpet, shiitake, and oyster. When I’m not in the kitchen, you’ll usually find me wandering the woods in search of new wild flavors.
