


How to Choose and Install an Inline Fan with Carbon Filter for Your Grow Space
Introduction
If you're serious about indoor gardening, controlling air quality isn't optional—it's essential. An inline fan with carbon filter is the gold standard for maintaining fresh, clean air while eliminating unwanted odors from your grow tent or indoor garden.
After testing dozens of ventilation setups throughout 2025 and into 2026, we've learned that the right fan and filter combination can make or break your growing environment. Poor air circulation leads to humidity problems, temperature spikes, and compromised plant health. The solution? A properly sized inline fan paired with a quality activated carbon filter.
This comprehensive guide covers everything you need to know: how these systems work together, how to calculate the right CFM for your space, step-by-step installation instructions, and maintenance tips that extend filter life by up to 40%. Whether you're setting up your first grow tent or upgrading an existing system, you'll find actionable advice backed by real-world testing and industry standards.

What Is an Inline Fan with Carbon Filter and How Does It Work?
An inline fan with carbon filter is a ventilation system that actively removes stale air while neutralizing odors. Understanding how these components work together helps you make smarter purchasing decisions.
The Science Behind Inline Fan Ventilation
Inline fans mount directly inside your ductwork rather than at the end. This "inline" positioning creates powerful, efficient airflow through enclosed spaces. Modern inline fans in 2026 use EC (electronically commutated) motors that consume 30-50% less energy than older AC motor designs.
The fan pulls air through connected ducting, creating negative pressure inside your grow tent. This negative pressure prevents odors from escaping through seams or openings. Air moves in one direction—exactly where you want it.
For detailed information on selecting the right fan type, check out our Complete Fan Selection Guide for Optimal Plant Growth which breaks down every option available.
How Activated Carbon Filters Eliminate Odors
Activated carbon filters use adsorption (not absorption) to trap odor molecules. Here's the key difference:
- Adsorption: Molecules stick to the carbon surface
- Absorption: Molecules are absorbed into the material
Quality carbon filters contain Australian virgin charcoal or RC-48 activated carbon with millions of microscopic pores. Each gram of activated carbon has a surface area of approximately 3,000 square meters—about half a football field. This massive surface area captures volatile organic compounds (VOCs) and odor particles with 99%+ efficiency when properly maintained.
Why Pairing Them Together Matters
Running an inline fan without a carbon filter moves air but doesn't clean it. A carbon filter without adequate airflow becomes ineffective within days. The combination creates a complete air purification system:
| Component | Function | Without Partner |
|---|---|---|
| Inline Fan | Moves air, creates negative pressure | Odors escape freely |
| Carbon Filter | Adsorbs odor molecules | Clogs quickly, no airflow |
| Combined System | Clean air + odor elimination | Optimal environment |
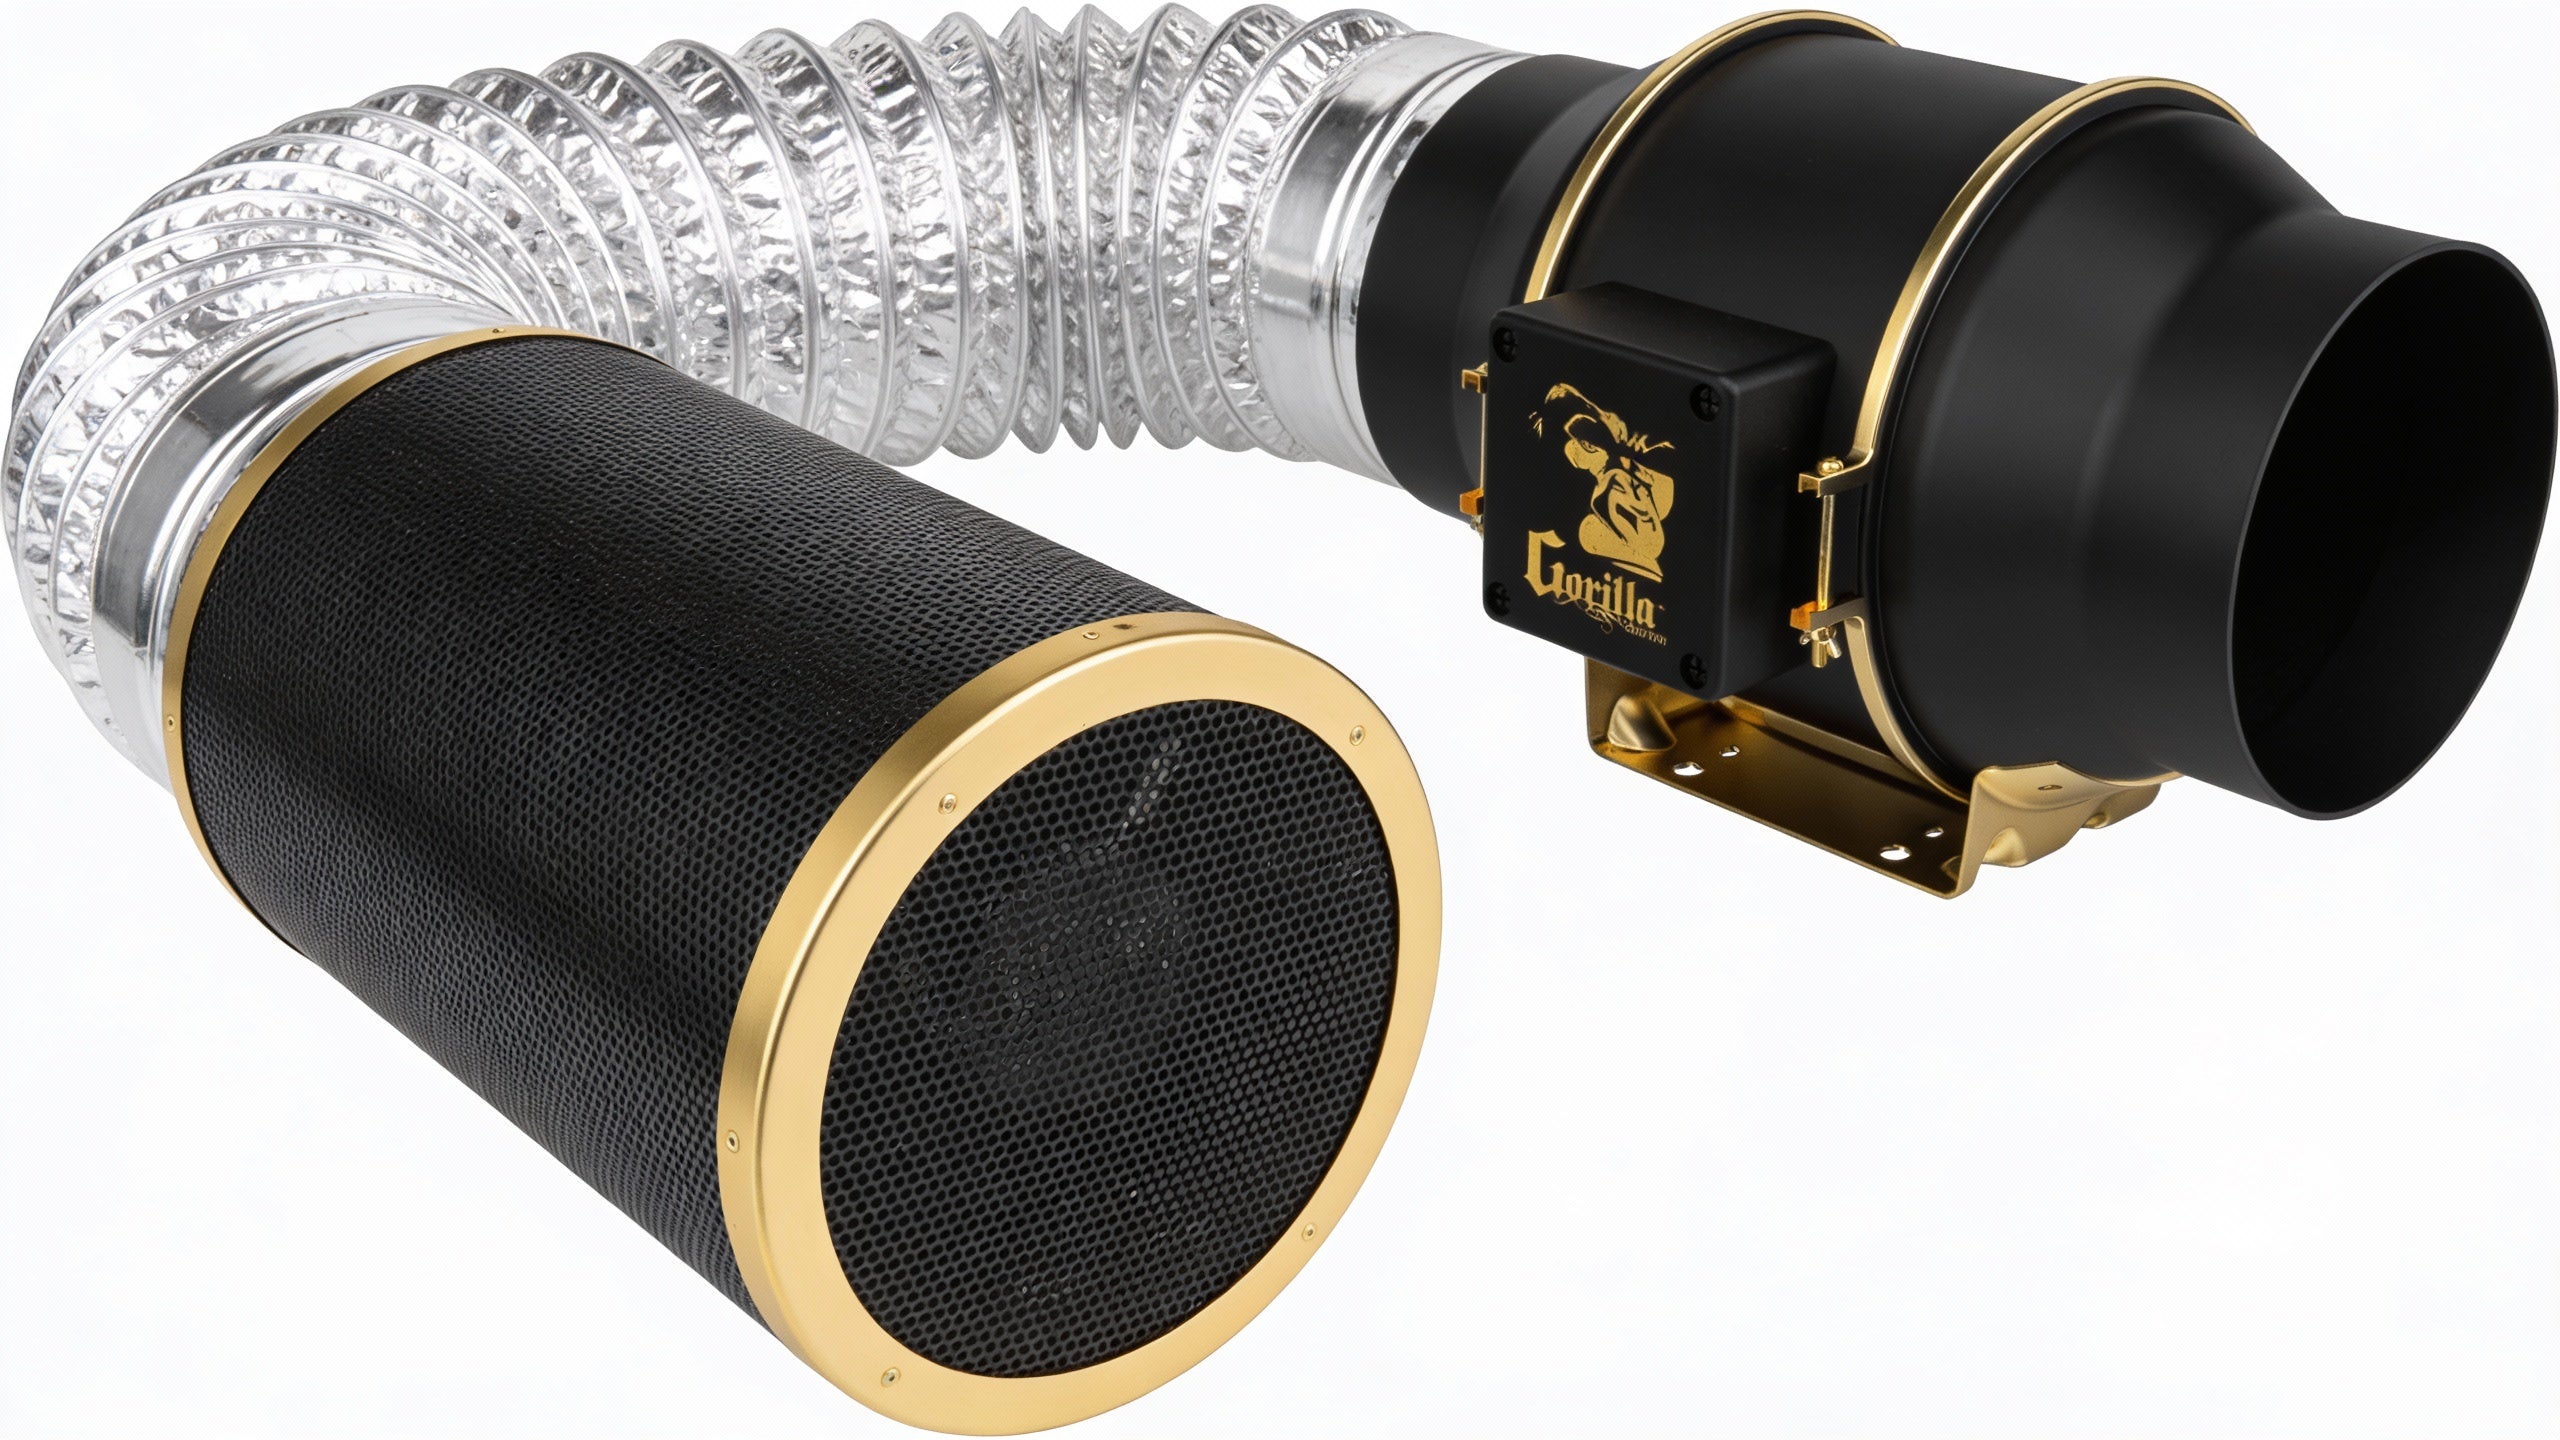
The Gorilla GXi Fan & Filter Combo represents the latest smart airflow technology, automatically adjusting fan speed based on environmental conditions.
How to Size Your Inline Fan and Carbon Filter Correctly
Sizing mistakes are the #1 reason ventilation systems underperform. Too small, and you'll struggle with heat and humidity. Too large, and you'll waste energy while creating excessive noise.
Calculating CFM Requirements for Your Grow Space
CFM (cubic feet per minute) measures how much air your fan moves. Here's the proven formula we've validated across hundreds of setups:
Base CFM = Length × Width × Height
Then apply these multipliers:
- Hot climates or HID lighting: Multiply by 1.5
- Carbon filter attached: Multiply by 1.25
- Long duct runs (15+ feet): Multiply by 1.15
- Multiple bends in ducting: Add 5% per 90° bend
Example Calculation:
- Tent size: 4' × 4' × 7' = 112 cubic feet
- Using LED lights (no heat multiplier)
- With carbon filter: 112 × 1.25 = 140 CFM minimum
- Recommended fan: 150-200 CFM for headroom
Matching Filter Size to Fan Capacity
Your carbon filter must handle your fan's CFM rating. Undersized filters restrict airflow and wear out faster. Here's a quick reference:
| Fan CFM | Minimum Filter CFM | Recommended Filter Size |
|---|---|---|
| 100-200 | 200+ | 4" diameter |
| 200-400 | 400+ | 6" diameter |
| 400-800 | 800+ | 8" diameter |
Pro Tip: Always size your filter 25% above your fan's maximum CFM. This extends filter life and maintains efficiency even as carbon becomes saturated.
Our guide on Air Duct Fans Inline explains how proper pairing affects long-term performance.

Step-by-Step Installation Guide for Your Inline Fan and Carbon Filter
Proper installation takes 30-45 minutes and requires no special tools. Follow these steps for optimal performance.
Tools and Materials You'll Need
Gather these items before starting:
- Inline fan and carbon filter (matched CFM ratings)
- Aluminum or insulated ducting (avoid flexible plastic)
- Duct clamps (2-4 depending on setup)
- Rope ratchets or heavy-duty hangers
- Duct tape (for sealing only—not primary attachment)
- Screwdriver
Installation Process
Step 1: Position the Carbon Filter
Mount your carbon filter inside the grow tent, near the top where hot air accumulates. Use rope ratchets attached to your tent's support bars. The filter should hang freely—don't let it rest on other equipment.
Step 2: Connect Ducting to Filter
Slide 6-12 inches of ducting over the filter's flange. Secure with a duct clamp tightened firmly but not crushing the duct. A small gap here destroys your system's efficiency.
Step 3: Attach the Inline Fan
Connect ducting from the filter to your inline fan's intake side. For quietest operation, mount the fan outside your tent. The Exhaust Fan for Grow Tent guide covers advanced placement strategies.
Step 4: Run Exhaust Ducting
Route ducting from the fan's output to your exhaust point—a window, vent, or into another room. Keep runs as short and straight as possible. Each 90° bend reduces efficiency by approximately 5-7%.
Step 5: Seal All Connections
Inspect every connection point. Air leaks mean odor leaks. Apply duct tape over clamp edges for additional sealing.
Step 6: Test the System
Power on your fan at medium speed. Hold a tissue near tent seams—it should pull inward, confirming negative pressure. Check for any whistling sounds indicating leaks.

Maintenance Tips to Maximize Filter Life and Fan Performance
A well-maintained system lasts 2-3 times longer than a neglected one. These practices protect your investment.
Carbon Filter Care
- Pre-filter installation: Always use the included pre-filter sock. This catches dust before it clogs carbon pores. Clean or replace pre-filters monthly.
- Humidity control: Keep grow space humidity below 70%. High humidity reduces carbon effectiveness by up to 50%.
- Storage: If storing unused filters, seal them in plastic bags. Activated carbon adsorbs ambient odors even when not in use.
- Replacement schedule: Replace filters every 12-18 months under normal use. Heavy odor environments may require 8-12 month replacement.
Inline Fan Maintenance
- Monthly: Wipe fan blades with a damp cloth to remove dust buildup
- Quarterly: Check all duct connections for loosening
- Annually: Inspect motor housing for debris; some models allow bearing lubrication
Explore the complete Grow Tent Accessories collection for replacement pre-filters and maintenance supplies.
Common Mistakes to Avoid with Inline Fan and Carbon Filter Setups
Learning from others' errors saves you time and money. Here are the top issues we encounter:
Top 5 Setup Errors
- Undersizing the system: Always round UP when calculating CFM needs
- Pushing air through the filter: Fans should PULL air through carbon filters for maximum contact time
- Ignoring pre-filters: Skipping the sock reduces filter life by 40-60%
- Excessive duct length: Every 10 feet of ducting reduces effective CFM by approximately 10%
- Neglecting negative pressure: Your tent should always pull slightly inward when zipped
Signs Your System Needs Attention
- Odors escaping despite filter running
- Fan working harder (louder) than usual
- Humidity levels rising unexpectedly
- Visible dust on filter exterior
- Tent walls pushing outward instead of inward
Frequently Asked Questions About Inline Fans with Carbon Filters
Q: How long does a carbon filter last with an inline fan?
A quality carbon filter typically lasts 12-18 months with continuous use. Lifespan depends on odor intensity, humidity levels, and whether you use a pre-filter. Heavy-duty applications may require replacement every 8-12 months. Always monitor for odor breakthrough as your primary indicator.
Q: Should the carbon filter go before or after the inline fan?
The carbon filter should always go before the inline fan in the airflow path. This means the fan pulls air through the filter rather than pushing it. Pulling creates better air-to-carbon contact time, improving filtration efficiency by 15-25% compared to push configurations.
Q: What size inline fan do I need for a 4x4 grow tent?
A 4x4 grow tent (typically 4' × 4' × 6.5') requires a minimum of 200 CFM when using a carbon filter. We recommend a 6-inch inline fan rated at 350-400 CFM for optimal performance with headroom for filter resistance and duct losses.
Q: Can I run my inline fan and carbon filter 24/7?
Yes, running your system 24/7 is recommended for consistent environmental control. Modern EC motor inline fans are designed for continuous operation and consume minimal electricity—typically $3-8 per month depending on size and speed settings.
Q: Why is my carbon filter not removing all odors?
Common causes include: saturated carbon (filter needs replacement), humidity above 70% reducing effectiveness, air leaks bypassing the filter, or insufficient fan CFM creating inadequate airflow. Check each factor systematically starting with connection seals.
Q: How do I reduce noise from my inline fan?
Use insulated ducting, mount the fan with vibration-dampening hangers, ensure proper sizing (oversized fans run quieter at lower speeds), and install a speed controller. The Gorilla GXi Smart Fan features built-in noise reduction technology.
Q: Do I need an inline fan if I already have clip fans?
Yes. Clip fans and oscillating fans circulate air inside your tent but don't exchange it. An inline fan with carbon filter actively removes stale air, controls odors, and maintains negative pressure. Both fan types serve different essential functions.
Conclusion: Your Next Steps for Perfect Air Quality
Choosing and installing an inline fan with carbon filter correctly transforms your grow space environment. Remember these key points:
- Size matters: Calculate CFM based on tent volume plus multipliers for heat, filter resistance, and duct length
- Quality components: Match filter CFM to exceed fan capacity by 25% minimum
- Proper installation: Pull air through filters, minimize duct runs, seal all connections
- Regular maintenance: Clean pre-filters monthly, replace carbon every 12-18 months
- Monitor continuously: Watch for negative pressure and odor breakthrough
Ready to upgrade your ventilation system? The Gorilla Grow Tent Kits include perfectly matched inline fans and carbon filters, eliminating guesswork and ensuring compatibility.
Don't let poor air quality compromise your indoor garden. Shop Gorilla Grow Tent's complete ventilation solutions today and experience the difference professional-grade equipment makes.

