


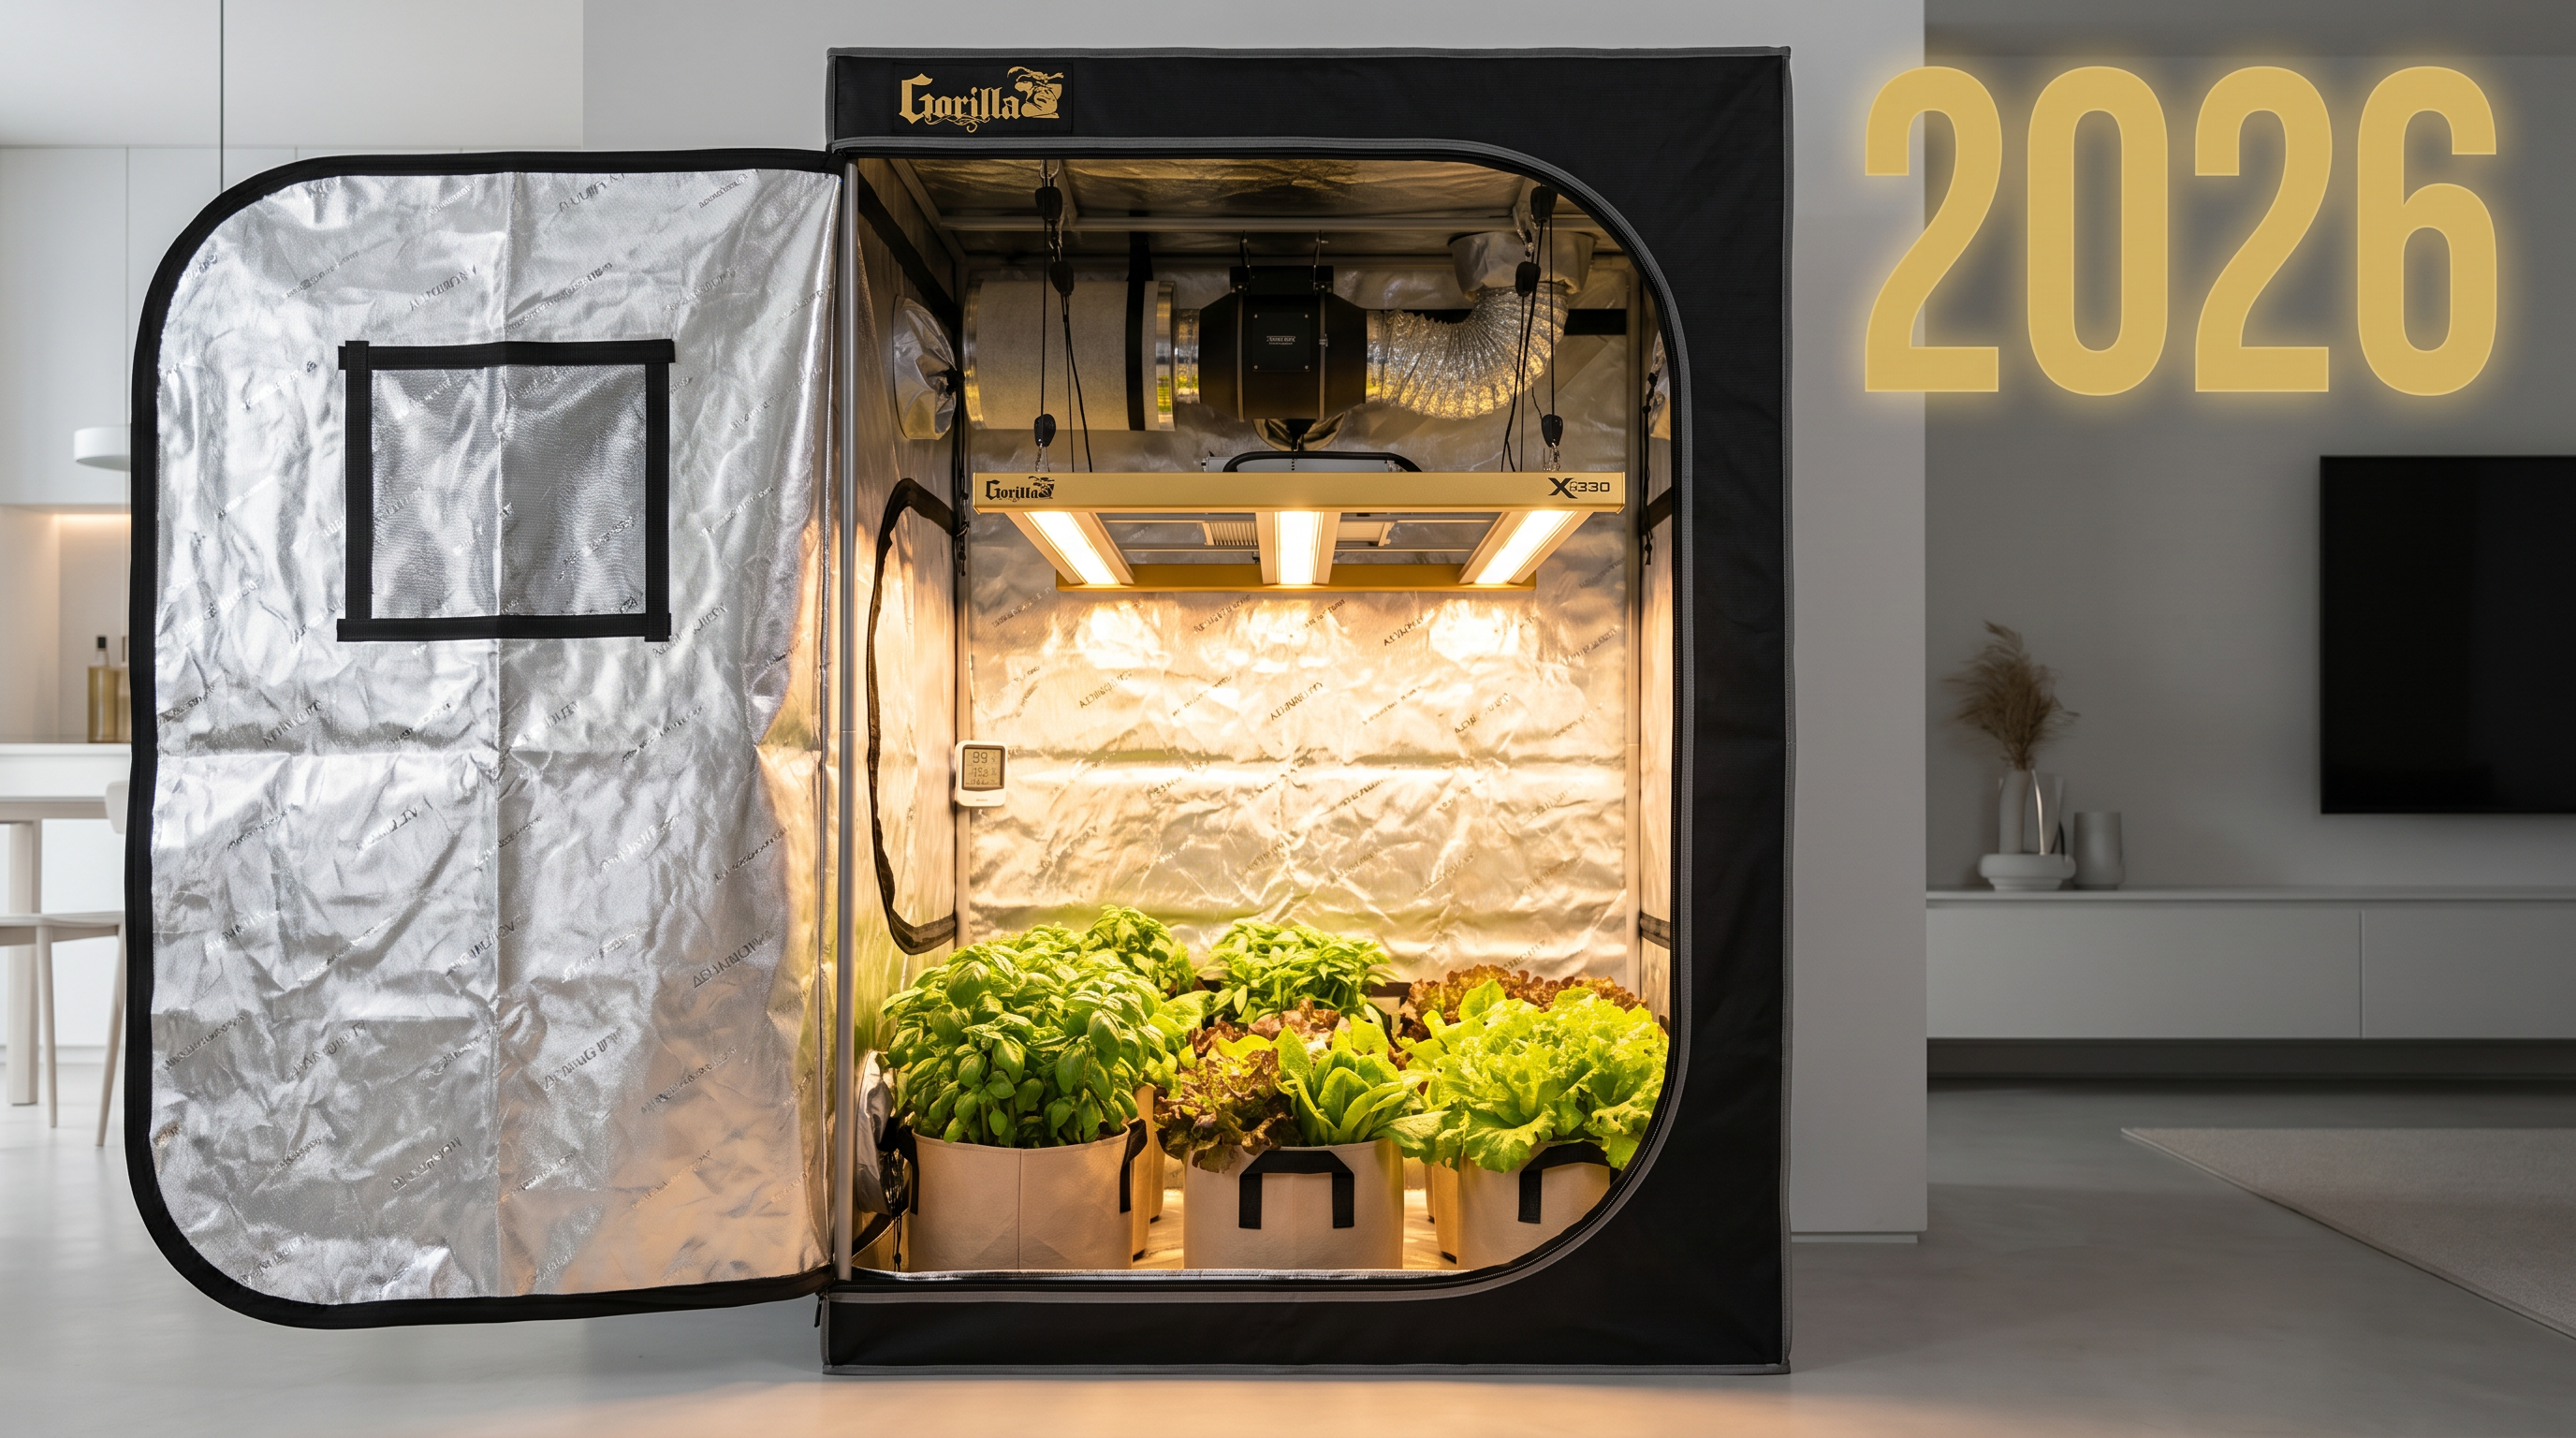
Complete Grow Tent Setup Guide 2026: Your Blueprint for Indoor Growing Success
A complete grow tent setup in 2026 consists of six core components: a 1680D canvas tent (sized to your space), a dimmable full-spectrum LED matched to tent wattage requirements, a variable-speed inline duct fan + carbon filter, a WiFi temperature/humidity sensor, fabric grow bags with quality potting mix, and a balanced nutrient line.
Target climate: 70–80°F day, 65–72°F night, 50–65% humidity, 14–16 hour photoperiod, and VPD between 0.8–1.2 kPa during vegetative growth.
Setting up a grow tent properly is the foundation of every successful indoor harvest. In 2026, app-controlled LEDs, smart variable-speed fans, and WiFi climate sensors make dialing in a tent easier than ever — but only if you pick the right equipment for your tent size and growing goals. This guide walks through every decision: sizing, lighting, ventilation, climate control, watering and feeding, and a five-step assembly that takes a weekend.
On This Page
- Why Your Grow Tent Setup Matters
- Step 1: Pick the Right Tent Size
- Step 2: Match LED to Tent Size
- Step 3: Size Your Ventilation
- Step 4: Dial in Temperature, Humidity & VPD
- Step 5: Nutrients & Watering
- Weekend Assembly: 5-Step Process
- Complete Setup Costs
- What Is New in 2026
- Common Setup Mistakes
- Frequently Asked Questions
Why Your Grow Tent Setup Matters
A properly configured grow tent controls every environmental variable that affects plant health: light intensity, spectrum, photoperiod, temperature, humidity, airflow, and (optionally) CO₂. Done right, it produces yields 30–50% higher than outdoor growing in the same square footage, year-round, independent of season or weather.
Done wrong, it is a $1,000 box that fights itself — heat spikes from a cheap LED, stale air from a weak fan, wilting plants from humidity drift overnight. The difference between the two setups is usually the first 2–3 equipment decisions.
Step 1: Pick the Right Tent Size
Tent size dictates every downstream decision: LED wattage, fan CFM, filter diameter, dehumidifier size. Start with the footprint that fits your space and plant count — do not over-size.
Gorilla Pro tents all use 1680D canvas — up to 9× stronger than standard 210D budget tents — and include a 1-foot height extension kit free in the box (extends 6'11" to 7'11"). For more detail see our 4x4 vs 5x5 comparison.
Step 2: Match LED to Tent Size
Your LED is the biggest quality-of-life variable. Cheap LEDs produce pale, stretched plants at the same wattage a quality LED produces dense, dark green canopies. Match wattage to tent:
| Tent | LED Pick | Price | PPFD at 18" |
|---|---|---|---|
| 2x2.5 / 2x4 | Xi220 (220W) | — | ~270 µmol/m²/s |
| 3x3 | Xi330 (330W) | — | ~360 µmol/m²/s |
| 4x4 | Xi420 (420W) | — | ~450 µmol/m²/s |
| 5x5 / 4x8 | Xi750 (750W) | — | ~600 µmol/m²/s |
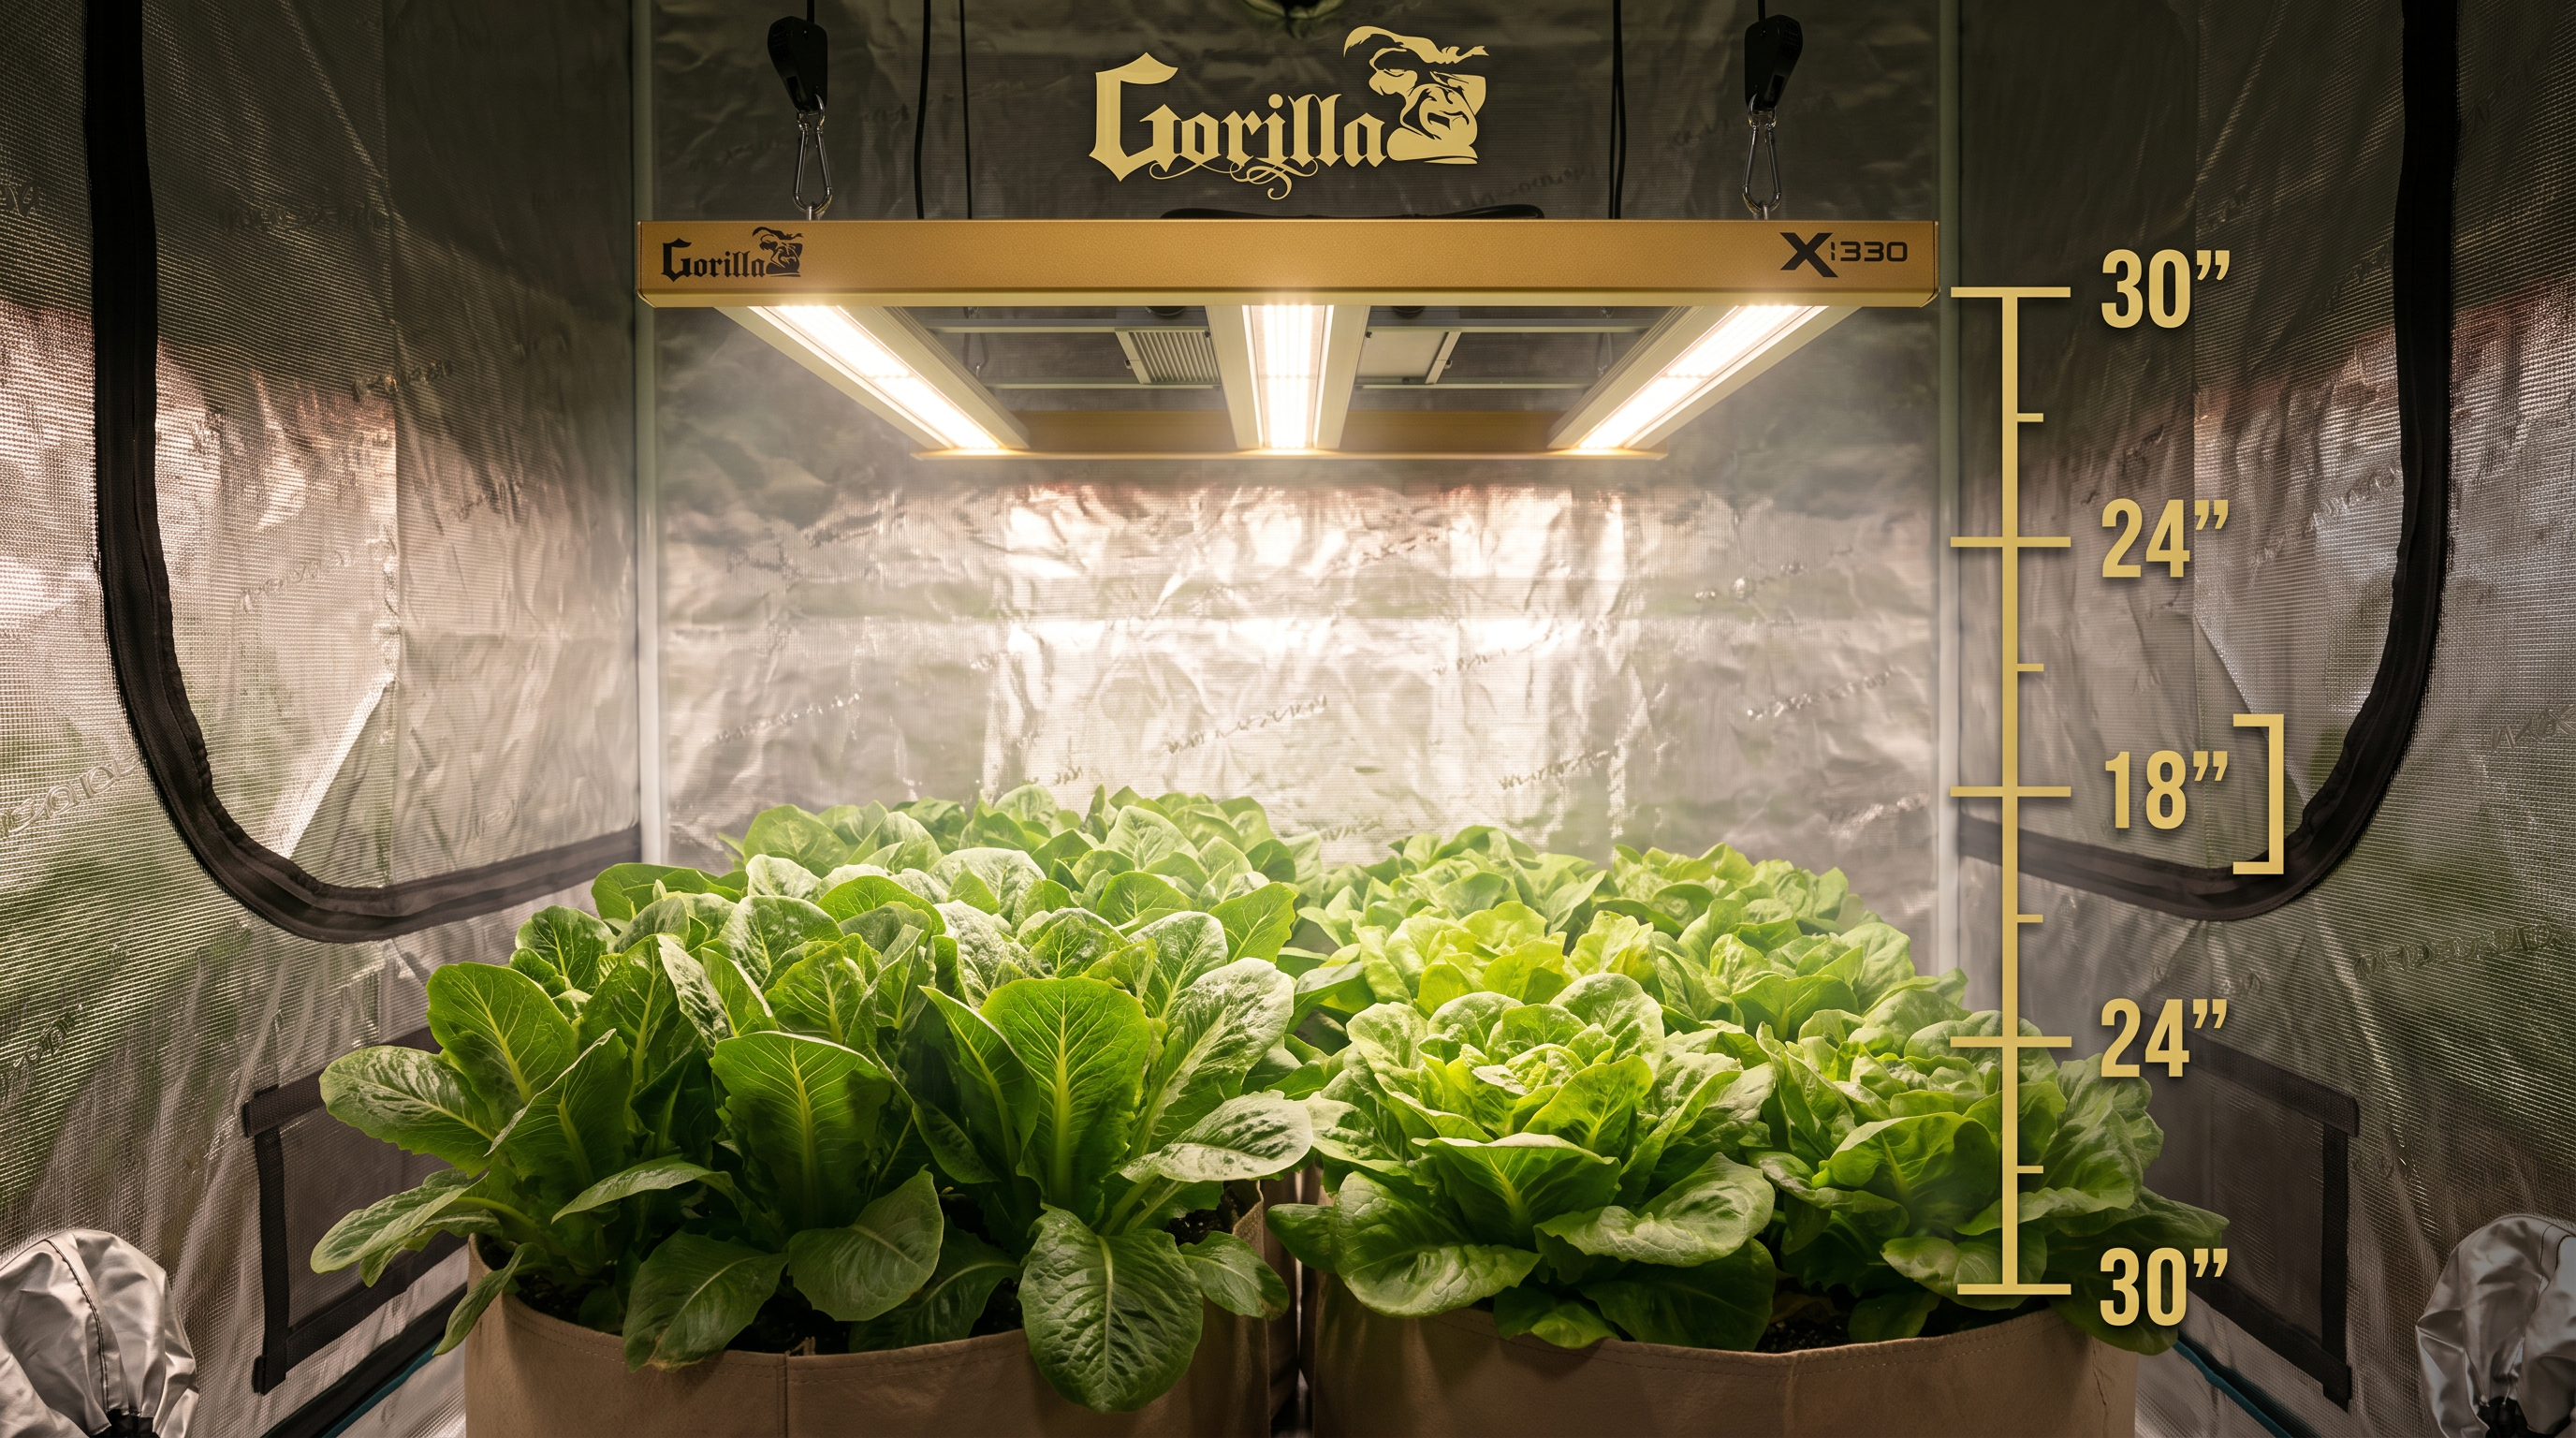
All Xi-Series LEDs are app-dimmable 0–100% via the Gorilla Grow Tent App, with tri-channel spectrum control. One LED serves every growth stage — dim to 30% for seedlings, ramp to 100% for flowering. See the LED distance chart for hang heights and PPFD for seedlings for seedling-specific settings.
Step 3: Size Your Ventilation
Ventilation does four jobs: removes heat, replenishes CO₂, strengthens stems, and prevents fungal disease. Size exhaust fan CFM to your tent volume (exchange ~1× per minute with 25–50% headroom for carbon filter resistance).
| Tent | Volume (7ft) | Fan CFM | Filter |
|---|---|---|---|
| 2x2.5 / 2x4 | 35–56 cu ft | 80–180 CFM | 4" × 12" |
| 3x3 | 63 cu ft | 140–200 CFM | 6" × 16" |
| 4x4 | 112 cu ft | 170–240 CFM | 6" × 16" |
| 5x5 / 4x8 | 175–224 cu ft | 300–400 CFM | 8" × 20" |
The GXi 6-inch Smart Inline Fan covers 2x2.5 through 4x4 with WiFi auto-ramping based on your tent's temp/humidity. Pair with a Gorilla Carbon Filter for odor control.
Step 4: Dial in Temperature, Humidity & VPD
| Stage | Day Temp | Night Temp | Humidity | VPD |
|---|---|---|---|---|
| Seedling | 72–78°F | 65–70°F | 65–75% | 0.4–0.8 kPa |
| Vegetative | 70–80°F | 65–72°F | 55–70% | 0.8–1.2 kPa |
| Early flower / fruit set | 72–80°F | 65–70°F | 50–60% | 1.0–1.3 kPa |
| Late flower / fruiting | 72–78°F | 60–68°F | 40–50% | 1.2–1.5 kPa |
Track all of this with the GXi WiFi Temp & Humidity Sensor — ±0.3°C accuracy, 30-day history, push alerts on drift. See our full VPD chart for stage-by-stage targets. Winter growers: keep your tent warm guide.
Step 5: Nutrients & Watering
A balanced 3-part nutrient line covers every crop. Start at half strength for seedlings, ramp to full strength in veg, and switch to bloom formulas when flowers appear.
| Growth Stage | Nutrient | Dose | pH |
|---|---|---|---|
| Seedling (weeks 1–2) | Plain water | — | 6.2–6.5 |
| Vegetative (weeks 3+) | Lotus Grow Pro | ½–1 tsp/gal, every 2nd watering | 6.0–6.5 |
| Transition / early flower | Grow + Bloom Pro | ½ tsp each/gal | 6.0–6.5 |
| Fruiting / flowering | Bloom Pro + Cal-Mag | 1 tsp + ½ tsp Cal-Mag/gal | 6.0–6.5 |
| pH adjust | pH Up / pH Down | As needed | 6.0–6.5 target |
Water when the top inch of soil is dry. Fabric grow bags dry faster than plastic pots — expect every 2–4 days at mature size. Check our full Lotus nutrient lineup.
Weekend Assembly: 5-Step Process
Assemble tent frame and canvas (30–45 min)
Connect steel poles, clip canvas to frame, install floor tray. Gorilla Pro tents include numbered instructions and color-coded poles — no guesswork.
Hang LED and install ventilation (20–30 min)
Mount LED with ratchet hangers at 24" above the floor. Bolt inline fan to top exhaust port, attach carbon filter inside tent on fan intake. Connect ducting.
Install sensor and pair to app (10 min)
Mount WiFi sensor at canopy height (not near LED or exhaust). Pair tent LED, fan, and sensor to the Gorilla Grow Tent App. Set your target stage.
Add grow media and plants (15–20 min)
Fill 1–5 gallon fabric grow bags with quality potting mix (coco + perlite or peat-based). Plant seeds or transplant seedlings. Water in lightly.
Dial in schedule and start (15 min)
Set LED timer to 14–16 hours on. Dim to 30–40% for seedlings (ramp later). Set fan to auto-ramp based on temp/humidity. Close the tent and watch the app for 48 hours before making adjustments.
Complete Setup Costs
A complete beginner build — tent, LED, smart inline fan, carbon filter, WiFi sensor, grow bags, and nutrient starter — typically lands in the — range depending on tent size. Bundled complete grow tent kits include every component with compatibility guaranteed. See product pages for current pricing on each item.
What Is New in 2026
The 2026 generation of grow tent equipment is notably smarter than previous years:
- WiFi-integrated LEDs (Xi-Series) with tri-channel spectrum control via app
- Variable-speed smart fans that auto-ramp based on tent climate (no separate controller needed)
- Environmental sensors with 30-day history logging and push alerts
- Reinforced 22mm cold-rolled steel frames supporting heavier LED fixtures and CO₂ bottles
- Height-adjustable extension kits (included free on Gorilla Pro) for 8–9 ft ceilings
Common Setup Mistakes
| Mistake | Cost | Fix |
|---|---|---|
| Undersized LED for tent | Stretched plants, low yields | Match LED wattage to tent size (see table above) |
| Oversized LED at full power | Bleached seedlings, heat stress | Always dim LED to stage-appropriate level |
| Skipping the carbon filter | Odor complaints, disease entry | Every tent needs an intake and/or exhaust filter |
| No humidity monitoring | VPD drift, powdery mildew, slow growth | WiFi sensor is non-negotiable in 2026 |
| Poor tent sealing | Heat loss, pests in, odors out | Check all zippers + cinch all unused ports |
| Rigid schedule regardless of stage | Seedling burn, mature stretch | Adjust dim + photoperiod per growth stage |
Frequently Asked Questions
What do I need for a complete grow tent setup?
Six core components: a quality canvas tent (1680D), a dimmable full-spectrum LED, an inline fan + carbon filter, a WiFi temp/humidity sensor, fabric grow bags, and balanced nutrients. Total investment: $1,000–1,500 for a complete build.
What size grow tent do I need?
2x2.5 for closets and 1–3 plants, 3x3 for spare rooms and 2–4 plants, 4x4 for serious home production with 4–6 plants, 5x5 or 4x8 for dedicated grow rooms. See our 4x4 vs 5x5 guide.
How long does it take to set up a grow tent?
2–3 hours for a beginner from unboxing to first plants in. The tent frame alone takes 30–45 minutes. LED, fan, and sensor setup takes another hour.
What is the best grow light for an indoor tent in 2026?
A dimmable full-spectrum LED matched to your tent size. The Xi220 covers 2x2 to 3x3, Xi330 handles 3x3 to 4x4, Xi420 for 4x4 to 5x5, Xi750 for commercial sizes. All dim cleanly and offer app control.
Do I need a dehumidifier in my grow tent?
Only during late flower/fruiting in humid climates. Most setups stay inside target humidity range (40–70% depending on stage) with just exhaust fan + intake. Add a dehumidifier if tent RH exceeds 65% during late-stage growth.
How much does a complete grow tent setup cost?
A complete build — tent, LED, fan, filter, sensor, grow bags, and starter nutrients — typically ranges from about $1,000 to $1,500 depending on tent size. See product pages for current per-item pricing.
What temperature and humidity should I maintain?
70–80°F day, 65–72°F night, and 50–65% humidity for most crops. Adjust by growth stage — higher humidity (65–75%) for seedlings, lower (40–50%) for late flower. Target VPD 0.8–1.2 kPa during veg.
Can I set up a grow tent in my apartment?
Yes. A 2x2.5 Gorilla Pro tent fits in a closet, runs quietly with a smart inline fan, and uses less electricity than a space heater. Carbon filter eliminates odor, so neighbors will not notice.
Do I need to add CO₂ to my grow tent?
Not for beginners. CO₂ supplementation (800–1,500 ppm) boosts yields 20–40% but only under high PPFD (1,000+ µmol/m²/s) and sealed-room conditions. Master basic climate first, add CO₂ in year 2+.
What grows best in a grow tent for beginners?
Lettuce, basil, and herbs forgive mistakes — ready in 4–8 weeks. Tomatoes and peppers are the next step once you master climate. See our beginner setup guide.
Related Guides
Go deeper: Beginner Setup Guide · 4x4 vs 5x5 Comparison · LED Distance Chart · VPD Chart · Indoor Herb Garden · Keep Tent Warm · PPFD for Seedlings
Build a Grow Tent That Works the First Time
Quality equipment paired with the right setup saves years of troubleshooting. Gorilla Pro tents + Xi LEDs + smart ventilation = a complete build you will not outgrow.
